User guide
Everything about using UUP in one place. Try searching for what you need.
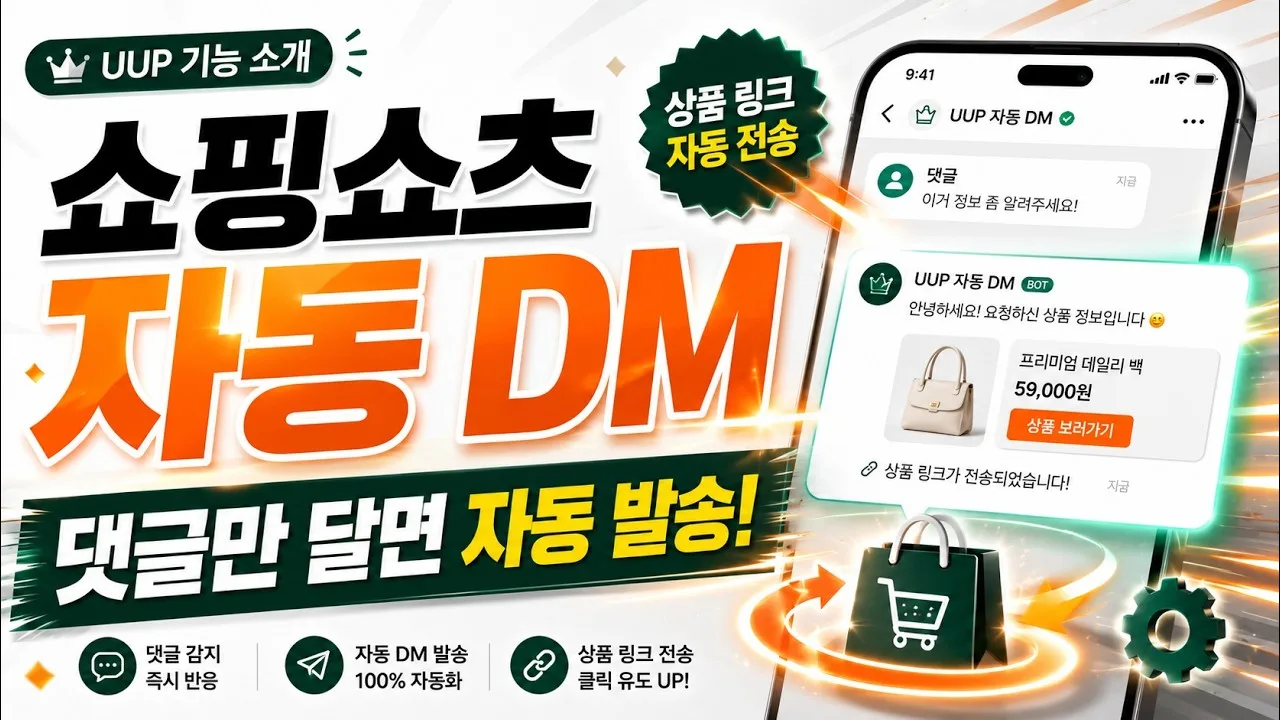 Learn everything in one videoA full walkthrough from signing up to DM automation.Full video 1:34:16 · 댓글 키워드 자동 답장 DM 설정법 | UUP 사용법(개정판)Watch on YouTube
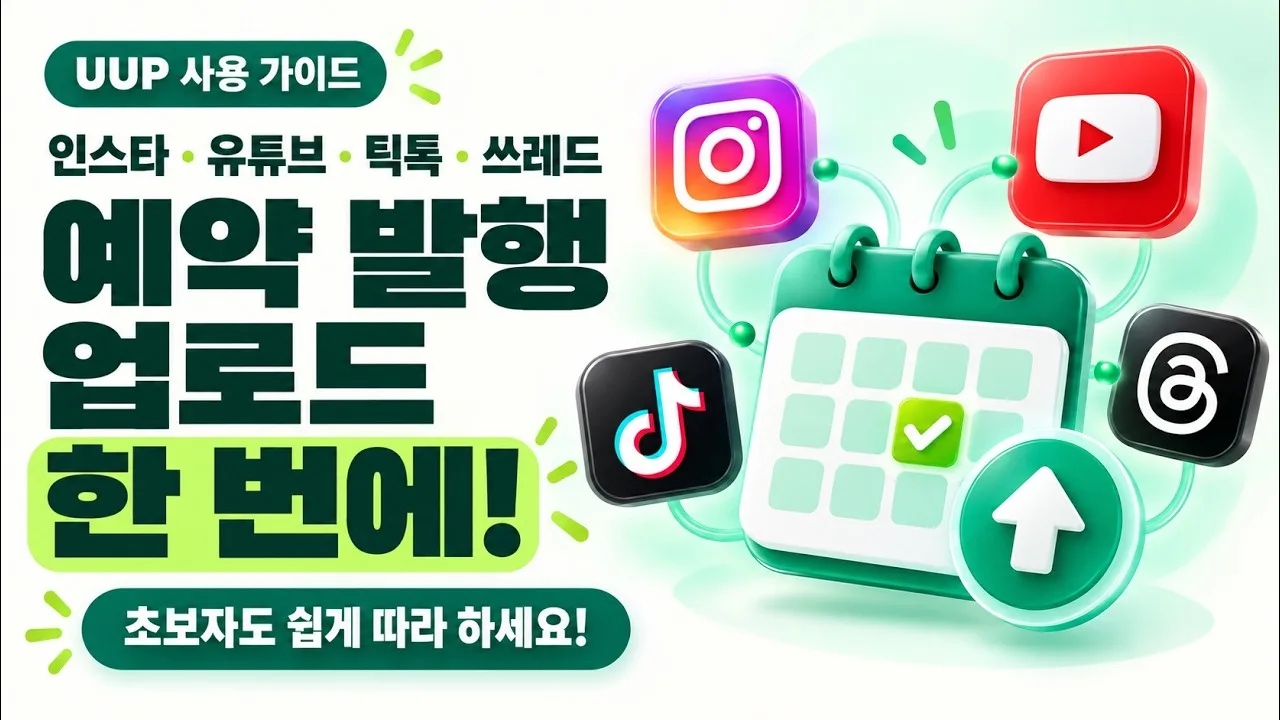 Auto-upload video courseFollow four examples of scheduling uploads to Instagram, Threads, YouTube Shorts, and TikTok.Full video 14:26 · 인스타·유튜브·틱톡·쓰레드 예약 업로드 한 번에! 초보자도 쉽게 따라 하는 UUP 사용법Watch on YouTube
Getting started
New to UUP? This chapter walks you through everything from signing up to the moment just before you create your first link page. Signing up usually takes about 3 minutes.
Before you sign up
- You can sign up and log in only with a Kakao account or a Google account. There is
no separate email-and-password signup.
- When you sign up, you get a 14-day free trial. No card registration is needed.
- The free trial is offered once per verified phone number. If you sign up again with a
number that has already used the trial, you start on the Free plan, and you can pay right away from the plans page whenever you need to.
- The signup screen has a Promotion code (optional) field. If you have a code, enter it
before pressing the login button. If you forget, you can apply it once per account after sign-up from the Promo code card in Settings.
Start with Kakao or Google
- Go to the UUP Get started screen.
- If you have a promotion code, enter it in the Promotion code (optional) field first.
- Press the Start with Kakao or Start with Google button.
- Log in with your account on the Kakao or Google login screen, and you'll be brought back
to UUP.
If this is the first time you've logged in with that account, the Finish signing up screen appears next. If you've already completed signup with that account, you go straight to the dashboard.
If you open the link inside the KakaoTalk app, Google login is restricted and only the Kakao button is shown. To sign up with Google, open the link in a regular browser such as Safari or Chrome.
Finish signing up — phone verification
The first step on the finish-signup screen is phone verification.
- Enter your number in the Phone number field. Example:
01012345678 - Press the Get verification code button, and a 6-digit verification code arrives
by text message.
- You need to enter the code within 3 minutes. The remaining time is shown next to the
input field.
- Enter the code and press Confirm code to complete verification.
If verification isn't working, try the following.
- If you entered the wrong number, press Edit number to fix it and request a new code.
- If the code expired or the text message didn't arrive, press Resend. You can request a
resend once every 60 seconds, and once a new code arrives the previous one can no longer be used.
- If you enter the wrong code 5 times, that code becomes invalid. Press Resend to get a
new one.
- If you're unable to receive text messages, press the Can't verify? Contact us button.
A chat opens where you can talk to the support team right away, and after checking, they will set you up to use UUP without verification.
If you live outside Korea
For residents overseas without a Korean phone number, there's a way to skip verification.
- Press Start without verification below the phone verification step.
- Read the notice in the dialog and press Continue without verification, and signup
proceeds without verification.
However, because the free trial is offered once per verified number, signing up without verification means the 14-day free trial is not provided. If you complete phone verification later, you can receive the trial at that point.
Required checks and optional consents
After the phone step, the consent step appears.
- (Required) Agree to the Terms of Service
- (Required) Confirm the Privacy Policy
- (Optional) Receive offers and news by email
- (Optional) Receive offers and news by SMS
You can sign up even if you decline the optional consents. Check the two required items and press Agree and finish signing up to complete signup and go to the dashboard.
If you want to pause signup for now, press Continue later at the bottom of the screen. The next time you log in with the same account, you can pick up where you left off. If you press Cancel signup, the information you've entered so far is deleted and you'll have to start signing up again from the beginning.
How long does my login last
- Once you log in, you stay logged in even after closing the browser. There's no need to
log in again every time.
- If you don't visit for 14 days, you're logged out automatically.
- Even if you keep visiting, you'll need to log in again **once 30 days have passed since
your last login**.
- You can stay logged in on multiple devices at the same time. You can check your logged-in
devices and log them out in Settings.
Creating your first page
Once you've signed up, you can create your first link page right from the dashboard.
- In Pages, press New page.
- If it's your first time, the UUP welcome guide cards appear. You can flip through them or
skip them with "Don't show again".
- Under "Which style would you like to start with?", choose between Shopping page
(default) and Recipe book.
- Choose your page address. The address your visitors will use is created in the form
link.uup.kr/youraddress, and you'll see right away whether the address is available.
- Enter a page name. You can change the name anytime later, and the address can be
changed too (when you change the address, visitors are automatically forwarded from the old address to the new one for 30 days).
- Press Create and start editing to create the page and go to the editing screen.
If you were using another link service, you can bring your existing page's content over as-is with Import at the bottom of the screen. For details, see the 'Importing from Inpock Link' chapter.
Frequently asked questions
I pressed the login button, but the login screen appeared again
If you see the notice "Your login request expired and couldn't be completed", the login request was too old to finish. Pressing the same button once more usually logs you in right away.
I don't see the Google login button
In the browser inside the KakaoTalk app, Google login is restricted and only the Kakao button is shown. If you open the link in a regular browser such as Safari or Chrome, you can start with Google.
The verification text message isn't arriving
First check that the number you entered is correct, then press Resend. Sometimes the message is sorted into the spam folder. If you still don't receive it, press the Can't verify? Contact us button on the phone verification step to reach the support team directly. After checking, they will set you up to use UUP without verification.
It says "This phone number has already used the trial"
The free trial is offered once per verified phone number. If your number has already used the trial, you start on the Free plan, and you can pay right away from the Plans & billing screen whenever you need to.
Will I be logged out if I close the browser
No. Once you log in, you stay logged in even after closing the browser. You only need to log in again if you haven't visited for 14 days or 30 days have passed since your last login.
Create your page
A link page is your own page that gathers all your products in one place. Put just one link — link.uup.kr/your-address — in your Instagram profile, and visitors can browse the page and tap through to any product. This chapter walks you through creating a page, choosing its address, styling it, and publishing it.
Create a new page
- Go to Pages in the dashboard and press Create a page.
- On your first visit, a 4-card getting-started guide appears first. Press Don't show again and it won't come back.
- Under "Which style would you like to start with?", choose between Shopping page (a page that collects product links to sell from, selected by default) and Recipe book. For recipe books, see 'Using a recipe book page' below.
- Enter the page address and page name. You can change the name anytime later.
- Press Create and start editing — your page is created and you land right in the editor.
Moving over from another service? Press the Import button in the page list, enter your Inpock Link address, and your products come over as they are.
Using a recipe book page
The recipe book is a style built for cooking creators. Each recipe appears as a card, and you can attach Coupang Partners links to the ingredient list so visitors can shop right away. In the page list, a Recipe book badge marks it apart from shopping pages.
- Add a recipe: Press Add recipe above the editor list to open the creation screen. Fill it in this order: ① recipe name, intro, servings, and a finished-dish photo → ② ingredients (paste a whole ingredient-list text and it splits names and measurements into rows for you; attach a Coupang Partners link to a row and it pulls in the product image and name) → ③ cooking steps (upload several photos at once and step cards are created in order — write a description on each card). The recipe is then added to your page.
- Edit: Expand a recipe in the editor to fix its name, intro, servings, ingredients, and cooking steps right there.
- Visitor view: Visitors see each recipe as a card with its finished-dish photo and name; tapping the card expands the ingredients and cooking steps. They can check off ingredients they have, then use "Shop for missing ingredients" to open purchase links one by one for just what they need.
- In a recipe book, display settings apply per recipe — numbering follows the recipe card order, click counts are the total ingredient-link clicks for that recipe, and the search box reads "Search recipes".
- To import a 10000recipe.com post as a draft or generate cover and step photos with AI, see the 'Recipe book AI assistant' chapter.
Page address (link.uup.kr)
The page address is the public address visitors use to open your page. You choose the part that comes after link.uup.kr/.
- You can use lowercase letters, numbers, hyphens, and underscores, 3–30 characters.
- It's checked in real time as you type — when you see This address is available, you're good to go. If someone else is already using it or it's reserved, a notice appears.
- You can change the address after creating the page. In the editor, go to the Page settings tab → press Change next to Address (slug).
- When you change the address, the old one temporarily forwards to the new one for 30 days. During that time no one else can take the old address, so visitors arriving through links you've already shared are guided to the new address. After 30 days the old address stops forwarding and becomes available to others — so update the links in your Instagram profile and elsewhere before then.
A tour of the editor
The editor you see after creating a page is split into the editing panel on the left and the live preview on the right. The tabs run in this order: Products · Design · Profile · Notice bar · Analytics · Page settings.
- Your changes are saved automatically. No save button to press — "Auto-saved just now" appears at the top of the screen.
- Tap a product or an area in the preview and you jump straight to its editing screen.
- The top of the screen always shows live visitors, today's visits, today's clicks, and your product count.
- Press Open my page to check the actual public page in a new tab.
Style your profile and design
The Profile tab is where you set the basic info visitors see.
- Write your page name and intro (up to 500 characters), and pick a text size (S/M/L/B) for each.
- The profile image is recommended at 600×600px, up to 10MB per file (JPG/PNG/WebP/GIF). After uploading you can adjust position and zoom, and choose the shape (circle/square/wide), whether to show it, and its alignment. Animated GIFs upload as-is.
- Under Contact & social, you can register up to 10 links — email, phone, Instagram, YouTube, Threads, TikTok, X (Twitter), Facebook, KakaoTalk, and others. Add a label (e.g. "Business inquiries") and the text appears next to the icon. Choose where they show: top of the page, below the profile, above products, or bottom of the page.
The Design tab sets the mood of your page.
- The 5 theme presets (Midnight, Cream, Forest, Rosé, Noir) and the accent color (buttons, hover, highlights) are free to use. Text color is corrected automatically to match the background brightness.
- A skin applies a matching combination of background, accent color, and product layout in one go (Basic). You can still fine-tune everything afterward.
- Custom background color, the cover banner (a wide banner above the profile), and a full background image can be saved from the Basic plan up.
- Under Product display, choose the layout (list/2-column/3-column), card shape (rounded/square/circle/line), text alignment, shadows, and font. Some options are Basic-only.
Even on the Free plan, you can preview Basic-only styling. To save it, though, a notice will tell you the Basic plan is required.
Using the notice bar
Type a notice in the Notice bar tab and it shows on your public page; leave it empty and it's hidden. It's a good spot for event announcements or the paid-partnership disclosure for affiliate activity.
- A notice can be up to 200 characters.
- Choose the notice position from 4 spots: very top, below the profile, above products, or below products. Any URL you write in the notice automatically becomes a tappable link.
- You can set the text size and the text and background colors. The default palette is free; custom colors can be saved from Basic up.
- Turn on Pin to top while scrolling and the notice stays fixed at the top of the screen as visitors scroll down (only available when the position is "very top"). A long notice covers a lot of the screen, so we recommend keeping it short.
- Turn on the scrolling notice (marquee) and the notice flows in a single line from right to left. Only part of the text is visible while it scrolls, so if you're waiting on a partnership or app review, turn it on after the review is done.
- A page with Coupang Partners products must carry a paid-partnership disclosure. The notice bar's Insert disclosure automatically checkbox is an easy way to add it to the page. Keep in mind the notice bar is just one way to disclose on the page — anywhere else your affiliate links appear (posts, DMs, and so on) needs its own disclosure. See the 'Coupang Partners integration' chapter for details.
Page feature settings
Under "Features" in the Page settings tab, you can switch public-page behaviors on and off.
- Page language: choose Auto (the visitor's browser language), Korean, English, or Japanese. It applies to system text like the search box.
- Search box: lets visitors search products within your page. Recommended if you have many products.
- Show product numbers: numbers your products in order. If you've entered a number yourself, that number takes priority.
- Coupang Partners tag: when on, products added through the Coupang API get a "Coupang Partners" tag beneath them. Off by default — and turning it off doesn't change your disclosure obligations.
- Recently viewed product card: for visitors who arrive through a link pointing at a specific product, shows that product once more at the very top of the page.
- TikTok external-browser prompt: TikTok's in-app browser blocks some product links, including Coupang. When on, visitors coming from TikTok see instructions for opening the page in an external browser, reducing drop-off.
- Image-only products (Basic): shows only images, hiding text and banners.
- Show click counts (Basic): shows the click count on each product card.
- Hide UUP watermark (Basic): hides the UUP text at the bottom of the page. The report-a-problem link always stays.
Visibility and what visitors see
Under "Visibility · Danger zone" at the bottom of the Page settings tab, you can flip the Publish page switch on and off.
- While public, anyone can view the page at its
link.uup.kraddress. - Switch it to private and visitors see it as if it doesn't exist (404). As the owner, you can still check it in the editor's preview.
The public page visitors see is drawn top to bottom: profile (image, name, intro, contact icons) → notice bar → search box → product list (the order can shift depending on your notice position setting). The top of the screen has a Share icon and a Copy address icon so visitors can send your page to someone right away. At the very bottom sit the UUP watermark and the report-a-problem link. It's optimized for mobile, and when shared via KakaoTalk or Instagram DM, a preview card goes along with it.
Running multiple pages
You can create and run multiple pages under one account. Use it when you want separate pages for a second account or for different topics.
- In the Pages list, each page shows a summary of today's visits, clicks, and product count, plus its public/private status, at a glance.
- How many pages you can create depends on your plan. The Free plan allows 1; paid plans allow more. Check your plan's limit on the Plans & billing screen.
- If you switch from a paid plan to Free, only 1 page stays public and editable and the rest are locked. Nothing is deleted. Press Use this page in the list to switch which page is active anytime, and when you subscribe again, everything comes back as it was.
Page reset, deletion, and recovery
Both features live under "Visibility · Danger zone" in the Page settings tab. Before either runs, you verify it's you by signing in again with Kakao or Google.
Page reset keeps the address and returns only the content to its initial state.
- What's erased: all products, the profile (photo, intro, contacts), the design theme, the notice bar, and display settings.
- What stays: the address, the page name, the visibility setting, and visit statistics.
- Any DM automation pointing at those products stops along with them.
- A reset applies immediately and can't be undone. Use it when you want a fresh start at the same address.
Page deletion erases the entire page, including products, settings, and statistics.
- You can recover within 7 days of deleting. Open the deleted page's editor and you'll see a Restore page button.
- During the recovery period, no one else can take that address. After 7 days, permanent deletion begins.
- If you just want to empty the content and keep using the address, use reset instead of deletion. A deleted page holds onto its address only during the recovery period.
Frequently asked questions
I can't find a save button.
Changes in the editor are saved automatically. You can confirm with the "Auto-saved just now" indicator at the top of the screen. If "Save failed" appears, check your network and try again.
I switched to private, but I can still see the page on my screen.
The owner can always see the preview. Other visitors get a 404 — check from a logged-out browser or another device.
What happens to links I've already shared if I change the address?
Visitors arriving at the old address are automatically forwarded to the new one for 30 days. Update the links in your Instagram profile and elsewhere within that window.
Can I use a deleted page's address for a new page right away?
Not until the recovery period (7 days) ends. To start fresh while keeping the address, use reset instead of deletion.
Will my pages be deleted if I switch to Free?
No. One page stays public and editable and the rest are locked. You can switch which page is active from the list, and when you subscribe again, everything comes back as it was. Basic-only styling (cover, background, custom colors, watermark hiding, and so on) just won't apply on the public page until you resubscribe — the settings are kept, so they return as they were when you do.
Managing Products
This chapter shows you how to add and manage the products on your page, along with the other items that go with them (text, dividers, images and banners, and more). You manage products in the Products tab of the editor, which opens when you open a page from Pages. A live preview sits on the right side of the editor, so you can see exactly how each change will look to visitors the moment you make it.
Item types at a glance
Press Add product and you'll first choose an item type.
| Type | When to use it |
|---|---|
| Link | The most basic product. Add a title, URL, thumbnail, and price to create a sales link. |
| Group link | Bundles several products together so visitors can expand and collapse them. |
| Text | For notices and short messages. Plain text only — if you want a clickable link, create a link product instead. |
| Divider | Separates products. You can choose the line style (solid, dashed, dotted), thickness, and spacing. |
| Image/Banner | Shows an image at full size. Alt text is required, and you can attach one link. |
| Contact/SNS | Displays the contact and SNS items you registered in the Profile tab at this position. |
Adding a product
- In the editor's Products tab, press Add product.
- Choose Link as the type and enter a Title and Affiliate product URL. The URL must start with http:// or https://.
- A number is assigned automatically, but you can change it yourself. Enter a plain number like
1, or a decimal-style format like20-1. - Press Add and the product appears in the list and preview right away.
For Coupang products, use the Search Coupang products button to search by product name and pick one — the name, image, price, and Partners link are all filled in at once. If you paste a Coupang link directly, it's converted to an affiliate link automatically when you save. See the 'Coupang Partners integration' chapter for details.
You can also set these options along the way:
- Badges — Attach one or more eye-catching labels like "Best". You can set the background and text colors too. Available from the Basic plan.
- Tags — Enter several tags separated by commas. If you turn off Show tags on page, tags won't appear on the visitor screen, but products can always still be found through visitor product search.
- Click count for this product — Change how the click count is shown for this product only (follow page setting, show, or hide).
- Show this link full-width — Leaves the layout of other products as is, and makes only this product take up a full row.
Uploading a thumbnail image
There are three ways to add a thumbnail:
- Press Choose image and pick a file from your device.
- Drag and drop an image file onto the upload area.
- Paste the product image address into the Image URL field and press Fetch from URL. It has to be the address you get by right-clicking the photo (long-pressing on mobile) and choosing 'Copy image address' — not the product page link.
JPG, PNG, WebP, and GIF formats are supported, up to 10MB.
Showing prices and discounts
- Turn on Show price and enter the Sale price.
- If you want to show the pre-discount price as well, turn on Show previous price with strikethrough and enter the Strikethrough price. The strikethrough price must be higher than the current sale price.
- When you enter a strikethrough price, the discount rate is calculated and shown automatically. If you enter a number between 1 and 99 in the Discount rate field yourself, that value takes precedence.
The strikethrough only crosses out the previous price — never the current sale price.
Choosing a link style
Pick one of 6 looks under Link style.
| Style | What it looks like |
|---|---|
| Standard | The default look, with the thumbnail and title side by side. |
| Grid | Products are laid out in a checkerboard-style grid. |
| Text link | Text only, no image — clean and simple. |
| Card | A card with a large image and the title and price underneath. |
| Horizontal card | Image and text arranged side by side. You can set the Image position to left or right. |
| Image background | The photo becomes the background with text layered on top. |
You can set the Inner background color and Inner text color yourself; by default they follow the page theme colors. You can also choose the Text size from small, default, or large. The image background style always shows white text over the photo, so it's not affected by color settings.
Show/hide and scheduled publishing
- Every product has a Public switch. Turn it off and the product stays in the editor list but no longer appears on your public page.
- You can also switch right from each product card in the list with the Make private / Make public buttons.
- If any products are turned off, a notice with the count appears above the list, and Turn all public brings them all back at once.
To publish automatically from a specific time, set a Scheduled publish time.
- On the product edit screen, set the date and time you want in Scheduled publish time.
- Once scheduled, the product automatically stays private until that time. A Scheduled label appears in the list.
- When the time arrives, the product goes public automatically.
If you want to publish right now, leave the schedule empty. Switching a product to public cancels any pending schedule.
Reordering and pinning
- Drag a product in the list to move it where you want. You can also use the Move up / Move down buttons.
- Press a product's number button to use Change number and Move to position. Enter a different number to jump the product straight to that spot.
- Press Pin to top to fix the product at the very top of your public page — a Pinned label appears in the list. Press Unpin and it returns to its original spot.
- Sub-links inside a group can only be moved within the same group.
After reordering, you can revert with Undo.
Grouping products
You can bundle several related products into one group.
- In Add product, choose Group link as the type and enter a Group title. The Group description is optional.
- On the group card that's created, press Add sub-link to put products in. Each group holds up to 10.
- Sub-links work just like regular products — with their own thumbnails, prices, and visibility settings — and clicks are counted separately for each.
Groups have these options:
- Expanded by default — Visitors see the products inside the group as soon as the page opens. They can still collapse it.
- No numbering — This group and the products inside it show no number badges. Other products keep their numbers.
Search, sorting, and bulk changes
Once you have lots of products, use the tools above the list to find and organize them.
- Type a title into the Search products field to find it.
- Sort by Display order, Product number, Most recent, or Alphabetical. Sorting is for viewing the list only — the public page and preview order stay the same. To turn the current sort order into the actual layout, press Save this order as layout.
- Use the Tag filter to see only products with a specific tag.
To change several products at once, select them with checkboxes.
- Check the box on a product card, or use Select all N visible products (N is the count) to select everything currently shown. If a search or tag filter is active, only the filtered products are selected.
- Switch the selected products to Public or Private in one go, or use Add tags to apply the same tag to all of them.
- If only some fail, you'll be told how many succeeded and how many failed. Press Undo to revert only the products that actually changed.
Editing, duplicating, and deleting products
Manage each product with the tool buttons on its card.
- Edit — Edit everything again: title, URL, price, and more.
- Duplicate — Make another one with the same content. Handy when you're adding several similar products.
- Copy link — Pick one of three addresses. Direct link is a UUP URL that opens just this one product and counts clicks in your stats; Page link shows your page with this product at the top. Product URL copies the external address exactly as you registered it (e.g. a Coupang Partners link) — use it where you need the original address, such as Facebook or Threads, but note those clicks bypass UUP and are not counted in your stats.
- Create DM automation — Create a DM automation right away that automatically sends this product via comments and DMs. See the 'DM automation' chapter for details.
- Detailed stats — Check this product's click trends.
- Delete — Deletes the product after confirmation. If any DM automations use this product, you'll be told in advance how many are affected. After deletion, that button is removed from the send targets, and any DM automation left with no buttons to send is paused.
FAQ
I added a product but it doesn't show on my public page.
Check whether the product's Public switch is off or a scheduled publish is set. If any products are off, a count notice appears above the list, and Turn all public turns them all on at once.
I changed the sorting but the public page order stayed the same.
Sorting is a feature for viewing the editor list, so it doesn't affect your public page. To turn the sorted order into the actual layout, press Save this order as layout.
I can't reorder by dragging.
Reordering works when sorting is set to Display order, with the search term and tag filter cleared.
Can I use numbers like 20-1?
Yes. Besides plain numbers like 1, you can use the 20-1 format too — handy for slotting a new product in between products you've already added.
I can't fetch a thumbnail from an image URL.
Check that the URL ends in .jpg, .jpeg, .png, or .webp. Some sites block external fetching. In that case, save the image to your device and upload it directly with Choose image.
Connecting Coupang Partners
Coupang Partners is Coupang's affiliate program: you introduce Coupang products on your page or social media, and earn a commission when purchases happen through your links. Once you connect your Partners API key to UUP, regular Coupang product links are automatically converted into quick links with affiliate tracking when you save them.
Requirements
- You can register an API key on the Basic plan or above.
- You need to be a Coupang Partners member, and the API key you issue must receive final approval from Coupang Partners before it actually works.
- If you're not approved yet, or you're on the Free plan, you can still paste quick links you created directly on the Partners site. See the "When conversion fails" section below.
Issuing and registering your API key
- Issue an API Access Key and Secret Key on the Coupang Partners site. The "approval prep checklist" on the Coupang connection screen has a link to the issuing page.
- On the Coupang connection screen, paste the issued keys into the Access Key and Secret Key fields of the Register API key card. Be careful not to let leading or trailing spaces slip in while copying.
- Press Save and check status. Your keys are stored encrypted and won't be shown on screen again.
When you need to change keys, press Replace keys on the same screen and save the new keys — they replace the existing ones. If you press Disconnect, Coupang links you save afterwards are no longer auto-converted, and your existing product links stay as they are.
Checking approval status
Once you save your keys, the connection status is shown on screen.
| Status | Meaning |
|---|---|
| Not connected | You haven't registered keys yet. |
| Awaiting approval | Your keys haven't been approved yet, or Coupang's confirmation is delayed. |
| Connected | Automatic conversion is available. |
| Key check failed | The Access Key or Secret Key is incorrect. |
| Disconnected | The saved keys are no longer in use. |
If the status is "Awaiting approval", finish registering your activity pages, then press Check status again to re-check.
Getting approved faster
When preparing for the Coupang Partners approval review, make sure to cover the points below. The "approval prep checklist" on the screen has the same content.
- Register every UUP page URL you run as an activity page on Coupang Partners.
- On each page that has affiliate links, make sure a disclosure notice (e.g. "I may earn a commission through Coupang Partners activity") is visible near the title or the top of the page, then capture a screenshot of each page.
Automatic product link conversion (quick links)
While the connection status is "Connected", a regular Coupang product link you enter on a product is automatically converted into a quick link when you save. Visitors are taken to the converted affiliate link.
If you want to convert right away before saving, press the Convert to affiliate link button on the product form. When conversion finishes, the affiliate product URL field itself is replaced with the converted quick link — the URL you see on screen and the URL visitors open are always one and the same. This button only appears for members whose Partners connection is active (Connected).
Conversion can take a moment. If you see "Still converting", just save as is. Processing finishes in the background, and if you press the button again a little later, the URL updates right away.
Adding products straight from search
Instead of copying product links over, you can also press the Coupang product search button on the product form and add products directly from search. Pick a product from the results and its name, image, price, and Partners link are filled in automatically.
Search has limits set by Coupang.
- Search terms can be up to 50 characters. If a long product title was automatically trimmed to fit, the screen tells you so — edit it if needed and search again.
- You can search up to 8 times per hour. Showing previous results for the same search term doesn't use up your count, and the screen shows how many searches you have left.
So you can find what you want in a single search, we recommend short search terms focused on the core product name.
When conversion fails
When automatic conversion fails, we don't quietly display the original link as if it were an affiliate link — we tell you on screen why it failed. For example, if a product is no longer for sale or isn't eligible for affiliation, Coupang won't create a link for it.
In that case, you can create a quick link manually and paste it in.
- Log in to the Coupang Partners site and create a quick link directly for that product.
- Paste the quick link as-is into the affiliate product URL field of the product form and save. Quick links are used as they are, without further conversion.
Even if you haven't received API approval yet, or you're on the Free plan, you can use UUP the same way by pasting manually created quick links.
Frequently asked questions
I registered my keys but the status stays "Awaiting approval"
The API doesn't work until Coupang Partners gives final approval. Finish registering your activity pages and displaying the disclosure notice, wait for Coupang's approval, then press Check status again.
It says "Key check failed"
This means the Access Key or Secret Key is incorrect. Check that no spaces slipped in while copying and that the keys are in a normally issued state on the Partners site, then save them again.
A product link I copied from search results fails to convert
Links copied from search results or recommendation lists carry extra parameters, and Coupang sometimes refuses to convert them. UUP tries once more with a clean base URL that keeps only the product address, but if it still fails, open the product page directly, copy the link from the address bar, and paste it in again.
What happens to my existing links if I disconnect?
Product links you've already saved stay as they are. Only Coupang links you save after disconnecting are no longer auto-converted.
Importing from Inpock Link
If you've been using Inpock Link, there's no need to rebuild your page from scratch. Import reads your products and page info from your Inpock Link address, lets you pick what to bring over in a preview, and moves everything to your UUP page in one go. Your original Inpock Link page is not changed, and the new UUP page stays private until you publish it.
What gets imported and what doesn't
Import transfers the following items.
| Imported | Not imported |
|---|---|
| Products (title, link, thumbnail) | Auto DM settings |
| Page name | Analytics |
| Bio | Detailed theme values |
| Profile image | API keys |
| Notice |
The page name, bio, profile image, and notice are imported when they can be reliably read from the original page's public view. You can choose per item, with checkboxes, whether to bring each one over.
Starting an import
- On the Pages list, click the Import button on the "Moving over from Inpock Link?" card. The same button also appears on the new-page creation screen.
- When the Inpock Link import screen opens, enter your original page address in the Inpock Link address field. The first part of the address is fixed, so you only need to type the last part.
- Under Which page should we import into?, choose the destination page. You can pick from your existing pages, or select Create a new page and import to start with a fresh address. If you only have one usable page, this step is skipped.
- Click Start importing and it proceeds in order: preparing the page, then reading your products. Once everything is read, the preview screen opens.
Pages locked by your plan's limits are shown as Locked in the list and can't be selected. Switch that page back to active in the Pages list and you'll be able to import into it.
Choosing what to bring over
The preview screen shows what was read, split into two groups: Page info and Products.
- It opens with every successfully read item already selected. Click Import n selected as is, and everything moves over at once.
- If you only want a few items, click Select all in the group header to clear everything, then check just what you need. Select all only applies to the selectable items within that group and doesn't touch selections in the other group. Each group shows "n/m selected" so you can see how many you've picked.
- Items that couldn't be read are shown with "Couldn't import" and the reason. You can add these yourself later while referring to your original page.
While importing — it can take a while
Clicking Import n selected starts the actual transfer. Each product photo is copied over to UUP's servers along the way, so the more items you have, the longer it takes. Hundreds of items can take a few minutes.
- The progress screen shows the elapsed time, so if you leave it open you'll see the results as soon as it finishes.
- The import keeps running even if you close the window mid-way. You just won't see the results screen, so open the page to check how far it got.
Checking the results report
When the import finishes, you can review the results on the "Import complete" screen.
- You'll see a n succeeded · n failed · n duplicates summary, along with a list where you can compare the imported items against the originals.
- Failed items are shown with the reason. Some items can fail — for example when a thumbnail photo couldn't be downloaded — and you can register just those yourself, using the original as reference.
- Duplicates are products that were already there when you ran the same import again. Instead of creating another copy, they're handled as "this product already existed, so we updated it".
- If the import stops part-way, the "Import stopped part-way" screen shows how far it got. Run the same import again and it picks up only the remaining items — no duplicate products are created.
On the results screen, click Publish now to make the page public right away, or Go to editor to polish it in the editor before publishing.
Imported products come in switched on
Every item you selected in the preview enters the page in the public (on) state. There's no need to switch each item back on one by one. Note that the page's own visibility is separate — if you imported into a new page, you'll need to switch it to public on the results screen or in the editor before visitors can see it.
Tidying up after importing
You can handle the transferred content exactly like content you created yourself. Try tidying it up in the editor like this.
- Compare against the original: Use the list on the results screen to scan whether titles, links, and thumbnails came through correctly.
- Edit: Click any product in the editor to change its title or link. For products missing a thumbnail, upload a new photo.
- Delete: Remove products you no longer sell, and rearrange the order however you like.
- Fill in what wasn't imported: Auto DM settings, analytics, and themes don't transfer — pick a new theme in the editor, and set up DM automation again after connecting Instagram. See the relevant chapters for details.
Frequently asked questions
Will my original Inpock Link page be changed or deleted?
No. Import only reads your original page and changes nothing. Your Inpock Link account and page remain as they are.
My internet dropped mid-import. Do I have to start over?
No. Run the same import again and it skips the items that already came through, picking up only what's left. No duplicate products are created.
Some product photos didn't come through.
If a photo couldn't be downloaded — due to the original server's condition, for example — that item is marked as failed. Check the reason in the results report, then register just those products or upload their photos yourself in the editor.
Can I re-import just a few items missing from a page I already imported into?
Yes. Run the import again targeting the same page, then in the preview click Select all to clear everything and check only the items you need. Products that are already there won't be duplicated.
Connecting Instagram
To use DM automation, you first need to connect your Instagram account to UUP. This chapter walks you through everything in order: the requirements for connecting, the connection steps, checking connection status, reconnecting, and disconnecting. You can open the connection screen at Instagram integration in the dashboard.
What to check before you start
The Instagram account you want to connect must meet the conditions below.
- It must be a professional account — either a Business or a Creator account works. Personal accounts can't be connected because Meta doesn't allow API connections for them at all.
- It must be a public account. Private accounts can't be connected.
- You don't need a Facebook Page. An Instagram account is all it takes.
The number of accounts you can connect (connection slots) depends on your plan.
| Plan | Accounts you can connect |
|---|---|
| Free · Basic | Not available |
| 14-day trial | 1 |
| DM Pro · Ultra | 3 |
Switching a personal account to a professional account
If you're on a personal account right now, you can switch to a professional account in the Instagram app in just a few minutes. Switching is free, and you can switch back anytime.
- In the Instagram app, open the Profile tab and tap the menu (≡) at the top right.
- Go to Settings and activity.
- Under Account type and tools, choose Switch to professional account.
- Follow the prompts to pick either Business or Creator, and you're done.
If you'd rather follow along on screen, check the relevant part of the UUP how-to video. The link below starts playing right at the point (1:06:50) that explains switching to a professional account.
Connecting your Instagram account
- Open the Instagram integration in the dashboard screen.
- Click the Connect Instagram button.
- You'll be taken to the Instagram login screen. Log in with the professional account you want to connect.
- When the list of permissions UUP is requesting appears, review it and agree.
- Once the connection is complete, you'll return to the UUP screen and see the message "Your Instagram account is connected. You can now create DM automations."
As soon as you're connected, you can create DM automations right away. For details, see the 'DM automation' chapter.
What permissions does UUP request, and why
You agree to three permissions during the connection process, and after connecting you can review them anytime in the Permission status section of the integration screen.
| Permission | Why it's used |
|---|---|
| Read comments (comments) | To check the auto DM trigger conditions (keywords and so on) in comments on your posts. |
| Private replies (private replies) | To send a private reply to someone who left a comment. |
| Send messages (messaging) | To send auto DMs. |
UUP only operates within the scope Meta allows. You can see exactly which messages are sent under which conditions at every step when creating a DM automation.
Checking your connection status
On the integration screen, each connected account has its own card. Here's what you can see on the card.
- The @account name and a Connected badge
- Sending status — shows whether auto DMs are being sent normally.
- Staying connected — An Instagram connection runs in roughly 60-day periods, and UUP keeps extending it automatically before each one ends. It has nothing to do with your plan period and there is nothing you need to do, so the card shows no date. The reconnect notice below appears only when automatic renewal has failed for over a week.
- Followers · post count — collected automatically once a day. Nothing is shown before the first collection.
- View recent post engagement — expand to see likes and comment counts on recent posts. Posts with hidden like counts are shown as "Likes hidden". Stats refresh once a day.
When you need to reconnect
If something goes wrong with the connection, a yellow notice banner and a Reconnect now button appear under the account card. What's going on depends on the message.
- "We couldn't renew your Instagram connection automatically." — Automatic renewal has failed for over a week. Reconnect with the same account and your DM automation won't be interrupted.
- "Your Instagram connection has expired (password change, etc.)." — Changing your Instagram password or doing a security logout immediately invalidates the existing connection. Reconnect with the same account and everything goes back to normal right away. When this happens, we also let you know via a UUP notification.
- "Webhook subscription check needed." — We couldn't verify the subscription state needed for sending. Reconnect with the same account and sending resumes.
When reconnecting, make sure you log in with the same Instagram account you originally connected. If you log in with a different account, you'll see "You logged in with a different Instagram account than the one selected." and the reconnection won't go through.
Connecting more accounts and disconnecting
Connecting more accounts — If you have connection slots left, an Add account button appears above the account list along with your usage, like "Connection slots 1/3". Click it to connect a new account through the same steps.
The Instagram login window may use the Instagram account signed in to your browser rather than the one you switched to in the Instagram app. When adding another account, check the account name shown at the top of the login window first. If it's an account you've already connected, use the switch-accounts or log-in-to-another-account option in that window, sign in with the account you want to add, then allow.
Disconnecting — Click the Disconnect button on an account card and a confirmation dialog opens. When you disconnect, the following happens together.
- This account's DM automations are paused immediately.
- Scheduled sends are canceled.
- If you reconnect the same account later, you can restore the paused DM automations after a confirmation step.
Frequently asked questions
I see "Personal accounts can't be connected"
The account you're trying to connect is still a personal account. Follow 'Switching a personal account to a professional account' above, then try again.
I see "@username is already connected"
If you were trying to add a different account and see this, the Instagram login window handed back an account you've already connected. That happens because the login window may use the account signed in to your browser rather than the one you switched to in the Instagram app. Use the switch-accounts or log-in-to-another-account option in the login window, sign in with the account you want to add, then allow. If there's no switch option, open instagram.com in your phone's browser, log out, sign in with the account you want to add, and then press Add account again. A private (incognito) browser tab works the same way.
I see "This Instagram account is already connected to another UUP account"
The same Instagram account can only be connected to one UUP account. If you connected it to a different UUP account before, log in to that account, disconnect it, and try again. If you can't access that account, let us know via 1:1 inquiry.
I get the error "Future off-Meta technology activity for this account is turned off"
If you see this message during Instagram login, the account's privacy settings are blocking Meta from connecting to external services. Only you can change this setting.
- In the Instagram app, open Profile → menu (≡) at the top right → Settings and activity.
- At the very top, go to Accounts Center → Your information and permissions → Your activity off Meta technologies.
- Under Manage future activity, choose Connect future activity.
- Try connecting again from the Instagram integration screen.
I see "The connection request has expired"
If you stay on the connection screen for too long, the request can expire. Just click Connect Instagram again and retry.
I see "The connection was canceled on Instagram"
You canceled the connection on the Instagram login screen, or consent wasn't completed on Meta's side. Please try connecting again. If the same message keeps appearing, also check the 'off-Meta technology activity' setting above.
I'm connected, but auto DMs aren't going out
First check the Sending status on the account card and any yellow notice banner. If a reconnect notice is showing, Reconnect now usually resolves it. If there's no banner and sending still isn't happening, let us know via 1:1 inquiry.
DM automation
DM automation is a feature where UUP replies by DM on your behalf whenever a comment is left on your Instagram post. For example, if you tell your audience "leave a comment saying 'link'", then every time someone comments 'link', an auto DM containing your product link is sent to them. You don't have to reply to every comment yourself, and comments left while you're asleep get a response without fail.
Requirements
You need two things to start using DM automation.
- Plan: DM automation is available on the DM Pro and Ultra plans and the 14-day trial. On the Free and Basic plans, you can use it after upgrading in Plans & billing.
- Instagram connection: you need to connect an Instagram professional account (Business or Creator) to UUP. Personal accounts cannot be connected. See the 'Instagram integration' chapter for how to connect.
At the top of the DM automation screen you'll see a card for your connected Instagram account. The card shows the connection status, the sending status (Normal · Waiting · Quota limited · Stopped), and the number of connection slots in use, and the Manage button takes you to the connection screen. The number of active DM automations and your plan's limit are also shown on this screen.
Creating a DM automation — 6 steps
Press Create DM automation in DM automation to open the 6-step creation screen. The steps run Start → Post → Keywords → Sending policy → Reply → Message, and you can move between them with the Back · Next buttons at the bottom. Even if you leave the screen while writing, you can pick up your auto-saved draft with "Continue writing".
Step 1 — Start
- Instagram account: choose the account that will send the auto DMs.
- DM automation name (optional): if you leave it blank, it's automatically named after the creation date.
- When to start:
- Activate immediately — starts as soon as you save, and applies to posts you upload from then on.
- Scheduled activation — turns on automatically 5 minutes before the time you schedule. So that it connects exactly to your "next post", set it 5 minutes earlier than your Instagram posting time.
- Sending mode:
- Send immediately — sends a DM as soon as a comment is left.
- Scheduled sending — collects comments from now on and sends them all at once at the scheduled time (within 7 days, in 30-minute increments).
- Batch sending — sends now, in one go, to comments already left (within the last 7 days), and then sends immediately to new comments after that. Only available for a specific post.
Step 2 — Post
Choose what the auto DM applies to.
- Pick a specific post (recommended) — choose directly from the connected account's list of posts.
- Next post — applies to the first post you upload after saving.
- All posts — reacts to comments on all posts, past and future.
Step 3 — Keywords
Decide which comments to react to.
- Everyone who comments — responds only to people who comment on this post, whatever keyword they use.
- Specific keywords — reacts only to comments containing your registered keywords. For matching, you can choose between Contains (the comment includes the keyword) and Exact match (the comment equals the keyword).
Add a keyword by typing it and pressing Enter, and you can register several at once by separating them with commas. In step 6 you can link a different message to each keyword.
Step 4 — Sending policy
This step is where you review the rules that auto DMs must follow under Instagram (Meta) policy.
- For a comment, we send one first DM — someone who commented receives exactly one first DM. On Instagram, the first DM goes out as the first message you wrote (text), and with follow check on, one Follow check button is attached to the same message. Product cards with a photo and buttons are sent after the recipient replies or presses Follow check. (Instagram first-DM cards have been turned off since September 7, 2026 because sending failed too often, even without a photo. Facebook Page DM automations can still send a card as the first DM for immediate sending — scheduled and batch sending go out as text.)
- Once they reply, we follow up with product cards — card-style messages (carousels) can only be sent within the 24-hour window that opens after the recipient replies.
- We don't message people who haven't responded again — sending additional DMs to non-responders is not offered, per policy. Try encouraging them to check with a public reply instead.
Step 5 — Reply
Separately from the DM, decide whether to leave a public reply on the original comment. A reply like "Sent you a DM! Please check it" also lets other visitors know an event is running. If you register multiple replies, they are sent in random rotation.
With scheduled sending and batch sending, public replies are turned off automatically so that a burst of replies in a short time doesn't trigger Instagram's limits.
Step 6 — Message
Write the auto DM that will actually be sent. The preview on the right is drawn to match what will really be sent.
- First message per keyword: you can write different text for each keyword. The length limit is 1,000 bytes (about 330 Korean characters). On Instagram, this text is sent as the first DM exactly as written — if you need a paid-partnership disclosure, include it in this text. Press Insert my link to pick a product from your link page and insert its link — you can choose between opening your page with that product shown as the top card, or a direct link that goes straight to the seller.
- Message after the user responds (optional): once the recipient replies, you can follow up with a product card carousel within 24 hours. Up to 10 cards; title and subtitle up to 80 characters each; up to 3 buttons per card (labels up to 20 characters). Products for the cards are also picked from your link page.
- If there's any paid relationship such as advertising or sponsorship, make sure to include a disclosure in the message and cards too.
On PC (instagram.com), cards and link buttons are visible, but Instagram does not display some buttons (Follow check). Everything shows normally in the mobile app.
When you're done writing, press Start DM automation at the bottom (or Schedule if you chose scheduled activation). If you don't want to turn it on yet, you can keep it as a draft with Save draft.
Follow check button
Instagram blocks DM links sent to people who don't follow you from being clicked. Most inquiries saying "I sent a link but it can't be clicked" are this case. Turning on Add follow check button in step 6 solves this.
- The first DM goes out as your first message + one Follow check button, and when the recipient presses Follow check, we check whether they follow you at that moment and send the follower message (or product cards) to followers, or a follow-invite card to those not following yet. Followers get the card on the tap only when What followers receive in the follow check area is set to Product card — with Text, only the follower message goes out and the card is sent only after the recipient replies. If you put the link only in the follower message or product cards, it will always be clickable. Instagram may not show the button in the message requests folder.
- Someone who doesn't follow you yet receives a card with Go follow and Follow check buttons as guidance. If they follow you, come back, and press it again, they get the follower message (up to 3 times per comment — the last card omits the Follow check button). Nothing more is sent to people who don't press the button.
- When you turn it on, suggested wording is pre-filled for the button label, the follower message, and the non-follower message — feel free to edit it. (While cards are active, the non-follower wording is not used — it is sent only when the card feature is off or a card cannot be composed. If you need a disclosure, put it in the card subtitle too.) You can keep your polished wording with Save this wording as mine and load it next time with Insert my wording.
- If you turned on follow check but a link is still in the first message, the Move link to follower message button moves it in one go.
Auto DM on Facebook Pages
You can also set up Auto DM on Facebook Page posts (since October 5, 2026). The builder and settings are the same as Instagram, minus a few things Facebook doesn't support yet.
- On the Facebook Page card in Channels, click Connect for Auto DM. If the Page is already connected for auto-upload, click Add DM permission on that Page's row. When Facebook asks you to choose Pages, choose to opt in to current Pages only and check the Page you want to automate.
- In Auto DM, click Create automation, choose Facebook Page under Platform in step 1, and select your Page.
- The remaining steps (post, keywords, sending policy, replies, message) work the same as on Instagram.
- The first DM is sent once within 7 days of the comment. With instant sending it can be text or a product card; with scheduled or batch sending it goes out as text.
- Public replies require your Page's comment management permission. Without it, turn public replies off and use Auto DM on its own. Public replies are turned off for scheduled and batch sending.
- The follow-check button, unread reminders, and follow-up product cards after a reply aren't available on Facebook yet.
Reusing as a template
Press Save template at the bottom of the 6-step creation screen to save your current message, reply, and keyword settings as a template. Next time you create a new DM automation, you can bring it in with Load template and choose how much to apply.
- Messages and replies only (default) — keeps the keywords you've registered and brings in only the messages and replies.
- Everything including keyword settings — the keywords to react to and the matching mode are also replaced with the values saved in the template. Handy when replicating the same setup across several posts.
Other ways to create one
- Create straight from a product: in the product list of your link page editor, press Create DM automation with this product and a draft containing that product's link is created automatically. Just review the post and the message, then start.
- Set up multiple DMs at once: with Multiple DM setup at the top of DM automation, you can link a product to each post and create several DM automation drafts in one go.
Checking sending activity and performance
- List screen: each DM automation shows a summary of its keywords, target post, and sent and opened counts. You can sort by newest or by post.
- Detail view: press a DM automation to see step-by-step performance running comment detected → DM sent → opened → link clicked, plus a summary of its settings.
- To see which product the link clicks led to, check Analytics for more detail.
Turning on/off, editing, deleting
- On/off: you can turn each one on and off anytime with the toggle in the list. All ON / All OFF at the top controls every DM automation at once, and Replies all ON / Replies all OFF toggles just the public replies in bulk.
- Edit and duplicate: each DM automation's menu offers Edit and Duplicate. Try duplicating a setup that works well and applying it to another post.
- Delete: press Delete in the menu and it's removed after confirmation. Sending history stays in your analytics, but the DM automation itself cannot be recovered.
Frequently asked questions
Does the first DM arrive as a card or as text?
On Instagram, the first DM goes out as text — your first message is sent as written, with one Follow check button attached when follow check is on. First-DM cards have been turned off since September 7, 2026 because sending failed too often, even without a photo. Product cards with a photo and buttons follow after the recipient replies or presses Follow check — comment → one Follow check tap → product card is the shortest flow. Set up the cards in step 6 under "Product cards after they reply (optional)" and set What followers receive in follow check to Product card (with Text, the card goes out only after a reply). (Facebook Page DM automations can still send a card as the first DM for immediate sending. Scheduled and batch sending are always text.) Note: on PC (instagram.com), Instagram does not display some buttons (Follow check) — they show normally in the mobile app.
My DMs aren't being sent.
DMs may not be sent, or may be delayed, in the following cases.
- Comments older than 7 days — a private reply to a comment can only be sent within 7 days of the comment being posted.
- Sending quota exceeded — once you hit the sending limit, sending is delayed or held, and the account card shows "Quota limited".
- Instagram connection expired — sending stops when the connection expires. Reconnect in Instagram integration and it returns to normal.
- Your own comments, or hidden/deleted comments — nothing is sent for these.
- Live comments after the broadcast has ended — live comments can only be replied to during the broadcast.
- Billing status — if your plan is canceled or expired, DMs won't go out even with the automation turned on. Check the notice at the top of the screen and review your plan in Plans & billing.
What happens when one comment matches several automations?
Only 1 auto DM is sent per comment. A DM automation targeting a specific post has the highest priority, then next post, then all posts. If several keywords match within one DM automation, a single message is chosen in the order of exact match first, then longer keywords.
I registered keywords but the DM automation doesn't react.
Keyword matching trims leading and trailing spaces from the comment and compares case-insensitively. If it doesn't react even in "Contains" mode, check whether your keywords were registered as one lump like "link,coords" — they should appear as separate items in the keyword list. If you enter them separated by commas, they are split and registered automatically.
Auto-upload
Auto-upload lets you prepare photos, videos, and text ahead of time, and UUP posts them to each channel for you at the time you set. It supports five channels — Instagram · Threads · Facebook Page · YouTube · TikTok — and you can schedule the same post to several channels and accounts at once. Publish times are in Korea time.
Watch the video tutorial first
If you're new, following along with the video is the fastest way to learn. It walks through four examples: a single Instagram photo, multiple photos to Instagram + Threads, a YouTube Short, and a video to Reels + TikTok.
- 인스타·유튜브·틱톡·쓰레드 예약 업로드 한 번에! 초보자도 쉽게 따라 하는 UUP 사용법 (14:26, published September 20, 2026 — in Korean)
The video was recorded when the menu was called 예약 발행 (Scheduled publishing). In the dashboard today, the same menu shows as Auto-upload.
Requirements
- Plan: Auto-upload is available on the Upload Pro and Ultra plans and the 14-day trial. It's not included in the DM Pro plan — on the Free, Basic, or DM Pro plan, change your plan in Plans & billing to use it.
- Monthly auto-upload limit: Upload Pro can schedule up to 300 posts a month, Ultra up to 600, and the 14-day trial up to 100. Check your usage and remaining count under Scheduled posts this month at the top of the Auto-upload screen.
- Connections per channel: Each channel includes up to 3 accounts. Each extra account slot raises the limit on all five channels by one.
- Each channel's 24-hour limit: Instagram and Threads have their own "last 24 hours" posting limit set by the platform. It doesn't reset at midnight — capacity comes back as posts pass the 24-hour mark. You can check it under posts in the last 24 hours on the screen.
Connecting channels
Connect channels from Connections > [Channels](/dashboard/channels) in the menu. The Connect channels button on the Auto-upload screen takes you to the same place. An Instagram or Facebook Page account you connect once is shared by DM automation and Auto-upload.
Each channel has something to know before you connect.
| Channel | Check before connecting |
|---|---|
| Personal accounts can't be connected. Switch to a professional account (Business or Creator) in your Instagram settings, then connect. | |
| Threads | Your profile must stay public for the connection to keep working. If you switch it to private, the connection expires and your scheduled posts fail. |
| Facebook Page | You need a Facebook Page, not just a personal profile, and you must sign in with an account that can manage the Page. You choose which Page to publish to when connecting, and you can connect several Pages separately. |
| YouTube | Connect with the Google account that owns the YouTube channel you want to upload to. |
| TikTok | After connecting, you choose a How to post option for each post (Post directly / Send to TikTok inbox). Visibility can only be chosen from the options TikTok provides. |
- Adding another Instagram account: Press Connect another account on the Instagram card. The login window may use the account signed in to your browser rather than the one you switched to in the Instagram app, so switch accounts or log in to another account in the login window.
- When the connection slots are full: If you see "You've used every connection slot for this channel," disconnect an account you don't use or add slots under Manage extra account slots. Reconnecting an account you've already connected doesn't need a free slot.
- Connected but no publishing permission: If you see that publishing permission wasn't granted, so scheduled posts will fail, reconnect the same account and allow every permission requested.
- Features that open after reconnecting: YouTube accounts connected before September 13, 2026 must be reconnected to use the first comment. Threads accounts connected before September 3, 2026 must be reconnected to open Threads engagement (replies, mentions, insights) and the Who can reply setting.
- Disconnecting: Disconnecting doesn't cancel remaining scheduled posts — they fail one by one at their publish time. Cancel them first, or disconnect after they've published.
Creating a post
Press Create a post on the Auto-upload screen to open the editor. It has three parts: Where should it go → What are you posting → When should it go out. If you have saved drafts, Continue writing appears at the top.
Where should it go — choosing accounts
Check the accounts to post to in Accounts to publish to. If you pick several, each account gets its own scheduled post with the same content, and after scheduling you can edit or cancel each one separately. Writing rules (caption length, options) follow the channel of the first account you picked, which is marked Composing basis. Accounts on channels that don't accept the chosen type get a note such as "This channel can only publish video."
What are you posting — type, photos, video, text
- Post type: Choose Single photo · Multiple photos · Video. Changing the type drops any photos or video that don't fit the new type — photos and video can go in the same post only in a Threads or Instagram Multiple photos post.
- Adding photos and video: Drag files onto the area or use the Choose photos · Choose a video buttons. You can reorder multiple photos. Instagram only accepts JPG, so PNG photos are converted to JPG automatically, and the screen tells you when that happens.
- Cover image (optional): The video's cover. Leave it empty and the platform picks a frame from the video. Only JPG and PNG work, and the field doesn't appear on channels that don't support covers (see the specs table below).
- Caption: When you change the channel, the character limit changes on the spot. Threads and TikTok count emojis as multiple characters.
- Per-channel captions: When you pick several channels, a switch such as "Write a separate Threads caption" appears for each channel. Turn it on to write a different caption for that channel only — handy for splitting a long Instagram caption from a short Threads post. With per-channel captions, the posts show separately per channel in the list and calendar.
- First comment (optional): Right after the post goes up, a first comment is added from your account. It works on Instagram, Threads, and YouTube; Facebook Page and TikTok don't support it. Leave it empty and no comment is added.
When should it go out — schedule, publish now, draft
- When to publish: Choose Schedule, then set the Publish time (Korea time). The quick picks Today · Tomorrow · In 2 days and 9 AM · Noon · 7 PM · 9 PM make it easy. You can't schedule a time in the past.
- Choose Publish now and publishing starts as soon as you save. It can take a few minutes depending on the channel.
- When you're done, press Schedule (or Publish now). If you don't want to post yet, use Save as draft. Drafts also need a publish time to be saved, and they show in gray on the calendar, but drafts never go out automatically. To post one, open the draft and schedule it.
- If only some of several accounts fail to schedule, the failed accounts and the reason are shown. Accounts that succeeded are unchecked, so after you fix the cause you can schedule again as is without posting the same content twice.
Templates
Use Templates to save a setup you use often and load it later. Press Save current content as a template to save the caption, first comment, channel settings, and publish time together. Photos and videos are picked per post. Leave the name empty and one is added automatically.
Specs by channel
Specs are checked when you save, so problems are caught before the publish time.
| Channel | What you can post | Text | Cover | First comment |
|---|---|---|---|---|
| Photo (JPG, 8MB each) · multiple 2–10 (photos and videos mixed — videos 3–60 s, 100MB) · video (posted as a Reel, 3 s–15 min, 300MB) | Caption 2,200 characters | Yes | Yes | |
| Threads | Photo (JPG/PNG, 8MB each) · multiple 2–20 (photos and videos mixed) · video (up to 5 min, 1GB) | 500 characters | No | Yes |
| Facebook Page | Photo (JPG/PNG, 4MB each) · multiple 2–10 · video (up to 20 min, 300MB) | Plenty of room | No | Not supported |
| YouTube | Video only | Title 100 characters · description 5,000 bytes · tags 500 characters | Yes (not for Shorts) | Yes (with conditions) |
| TikTok | Video only | 2,200 characters | No (first frame is used) | Not supported |
- Video files: MP4 or MOV, up to 3GB and 1 hour. Where a channel has a tighter limit (see the table), that limit applies when you pick the file (YouTube takes the full 3GB and 1 hour; TikTok length depends on the account). TikTok videos must be 360–4096px in both width and height.
- Instagram photo ratio: Photos outside the 4:5 (portrait) to 1.91:1 (landscape) range may be rejected when publishing, so you're warned in advance. With multiple photos, all are cropped to the first photo's ratio.
- Instagram hashtags: Up to 30 can be saved. But Instagram changed its policy in December 2025 to allow 5 hashtags per post, so with 6 or more you'll see a warning that the extra tags may not count.
- Instagram video: Published as a Reel and also shown in the feed.
- YouTube descriptions are counted in bytes, not characters. Korean, Japanese, and other non-Latin characters take 3 bytes each.
Channel settings
When you pick an account, the settings specific to that channel open too.
- Disclose AI-generated content: Turn this on if realistic scenes were created or meaningfully altered with AI. The post gets an "AI info" label. For multi-photo posts, it applies to the whole post.
- Facebook Pages don't have this setting because Facebook doesn't accept AI disclosures through auto-upload (the API). If a post needs the label, post it from the Facebook app with the AI label turned on, or say in the caption that it was made with AI.
YouTube
- Video title · Description · Tags (optional): YouTube has a separate title and description instead of a caption. Separate tags with commas; # is removed automatically.
- Visibility: Choose Private · Unlisted · Public.
- Scheduled visibility (optional, Korea time): Set a time and the video is uploaded as private first, then YouTube makes it public at that time. It's a different setting from the publish time (when the video is uploaded), and it must be at least 10 minutes after the publish time. Seeing the video as private until then is normal.
- Is this made for kids?: If you don't choose, it follows your YouTube channel default.
- Disclose AI-generated / altered content: Turn this on if realistic scenes were created or meaningfully altered with AI.
- Shorts covers: Covers for short vertical videos (Shorts) aren't applied through Auto-upload. Set them yourself in YouTube Studio after publishing.
- First comment: On YouTube, the first comment is added only to videos uploaded as public or unlisted right away. YouTube blocks comments on private videos, including ones with a scheduled visibility, so no comment is added there.
TikTok
- How to post:
- Post directly — UUP publishes the video to TikTok at the scheduled time. Choose the visibility, interaction, and commercial-content settings below. This is the default for new TikTok posts.
- Send to TikTok inbox — At the scheduled time the video is delivered only as far as the inbox in the TikTok app. Add the caption and visibility in the app and tap the final Post yourself.
- Visibility: There's no default, so you must choose one. The options available depend on your TikTok account settings.
- Viewer interactions: Allow comments · Allow Duet · Allow Stitch are all off by default. Turn on only what you want to allow.
- Disclose commercial content: Turn this on if the video promotes a brand, product, or service, then choose Your brand or Branded content. It adds a "Promotional content" label to the video. Branded content can't be posted as "Only me".
- Disclose AI-generated content: The video gets an "AI-generated" label that can't be removed after posting.
Threads
- Who can reply: Choose Everyone · Accounts you follow · Mentioned accounts only · Parent post author only · Your followers only. This can't be changed after the post is published.
Facebook Page
- Publishing to: If you connected several Pages, pick one here. To publish to a different Page, connect that Page on the channel connection screen first.
Managing scheduled posts — list and calendar
The Auto-upload screen has two views: Calendar and List.
- Calendar: Switch between Month · Week · Agenda. In Month view, select an empty date to create a post at 9 AM that day; in Week view, select an empty time slot to create a post at that time.
- List: Split into Drafts · Scheduled · Finished tabs, and you can narrow it down with the channel and account filters. Posts scheduled with the same content at the same time for several accounts are grouped into one row.
- What you can do: For scheduled posts, Edit and Cancel schedule; for drafts, Delete draft; for failed posts, Try again; for published posts, open them on the channel with View post. You can also remove the record of a finished post, but the post already published to your channel won't be deleted — to delete it, remove it on the channel itself.
Here's how to read post statuses.
| Status | Meaning |
|---|---|
| Draft | Saved only. It doesn't go out automatically. |
| Scheduled | Will go out at the publish time. |
| Processing | Being posted to the channel right now. |
| Published | It's up on the channel. |
| Checking if public | A video posted to TikTok with "Post directly" and visibility set to everyone. While TikTok reviews a new video it doesn't hand over the public link right away, so UUP checks again every 15 minutes and switches it to Published once it's public. If it's still waiting after 2 hours, it shows as Published as private and tells you where to check. Trying again here would post the same video twice. |
| Published to friends · Published to followers | Posted to TikTok with "Post directly" and the visibility you chose (Friends who follow each other / Followers). TikTok only gives a public link for posts visible to everyone, so this status appears instead of Published with a link. You can see the video in the TikTok app. |
| Published as Only me | Posted to TikTok with "Post directly" and the visibility you chose (Only me). Only you can see it and TikTok doesn't give a public link, so this status appears instead of Published with a link. To let others see it, change the video's visibility in the TikTok app. |
| Published as private | It was published, but the platform made it private. Trying again would post the same content twice, so check the visibility setting in that app instead. |
| Delivered to the inbox | A TikTok "Send to TikTok inbox" post was delivered to your app inbox. Add the caption and visibility there and tap the final post button to make it public. Trying again here would deliver the same video twice. |
| Failed | It couldn't go up. Check the reason and Try again. |
| Canceled | The schedule was canceled. |
Threads replies, mentions, and insights
Open Threads replies & insights from the Auto-upload screen to keep working on Threads posts you published with Auto-upload, right in the dashboard.
- Replies: Pick a post to see its replies, then Post reply right away, or tidy up spam with Hide · Unhide (hiding works on top-level replies only).
- Mentions: See public posts that mention you and reply to them right away.
- Insights: See profile views (last 7 days), followers, and per-post insights. A freshly published post can show zeros — the numbers take a while to come in.
Troubleshooting
It won't save and shows a message.
Specs are checked when you save. Fix what the message says — for example, "Captions can be up to 2,200 characters", "Right now this channel only accepts video", "You need between 2 and 10 photos", "Please choose a visibility" (TikTok), or "Scheduled visibility must be at least 10 minutes after the upload time" (YouTube).
I scheduled it, but it didn't go up.
You'll get a notification saying your scheduled post couldn't go up, along with the reason. Common reasons:
- No publishing permission / the connection expired — Reconnect that account under Channels. You're also notified ahead of time when a connection is about to expire.
- You've hit the channel's 24-hour posting limit — you can post again once earlier posts pass the 24-hour mark.
- It looks like this was already posted — first check on your account whether it actually went up, then try again.
- The platform couldn't process the media — use a different file or try again a bit later.
The post went up, but there's no first comment.
You'll get a notification that the post went live but the first comment could not be added. Leave the comment on the post yourself. On YouTube, check whether the video was uploaded as private or with scheduled visibility, and whether the account was connected before September 13, 2026 and needs reconnecting.
It says it's up, but others can't see it.
Check whether the status in the list is Published as private or Delivered to the inbox. For TikTok, finish posting from the app's inbox or check the visibility; for YouTube, check the visibility in YouTube Studio. A YouTube video with scheduled visibility appearing as private until that time is normal. If a TikTok "Post directly" video shows Checking if public, it's waiting for TikTok's review to finish — most switch to Published within about 30 minutes. If it still shows Published as private after 2 hours, check the video's visibility and notifications in the TikTok app, and see whether it shows up from another account or while logged out.
Analytics
See exactly who visited your page, how often, and which products got clicked — all in data. You can check your analytics in two places.
- Overall analytics: Analytics in the left dashboard menu — trends
over time, traffic sources, devices and visit times, and DM automation performance, all in one place.
- Analytics in the editor: open a page from Pages and you'll see live
metrics at the top, plus a Analytics tab showing per-product clicks for that page.
Live metrics in the editor
Four metrics appear at the top of the page editor, and they refresh automatically while the screen is open.
| Metric | What it means |
|---|---|
| Live visitors | The number of visitors active on your page within the last 5 minutes. |
| Today's visits | How many times your page was opened today (resets at midnight, Korea time). |
| Today's clicks | How many times products and links were clicked today. |
| Total products | The number of products and items on this page. |
Sometimes you'll see Aggregation delayed in place of the live visitor count. It means real-time aggregation is temporarily unavailable — your visit and click records are still being collected, so check back in a moment.
Visit and click trends over time
At the top of the Analytics screen you can choose a period (7 days · 30 days · 90 days) and a page. The default is 30 days, across all pages.
- Period visits · Period clicks · Unique visitors: totals for the selected period are shown
as cards. Each card also shows the change (%) compared with the previous period of the same length; if there's no earlier data to compare against, it shows "No comparison data".
- Visit & click trend: a graph of visits and clicks by date.
How unique visitors are counted
Unique visitors measures "how many people came". Even if the same person visits several times in one day, they count as just 1 for that day. It's normal for this number to be smaller than "Period visits", which counts every visit. Because counting is per day, a person who visited both yesterday and today is counted as 1 on each date. We don't plant cookies to tell visitors apart, and we don't store visitors' address information.
Per-product click performance
There are two ways to see which products get clicked the most.
- On the Analytics screen, use the page selector at the top to
choose a specific page and a Top clicked products table appears. While "all pages" is selected, you'll see a note saying "Select a page above to see product analytics".
- The Analytics tab in the page editor also shows that page's clicks per product and
contact & SNS clicks. In the product list, press the click count next to a product (Detailed stats — view click trend) to open today's clicks, total clicks, and a click graph for the last 30 days.
The click-to-visit rate in the top clicked products table is the number of clicks divided by the number of visits. Clicks can be recorded without a page visit — for example, when someone taps a link straight from an auto DM — so a rate over 100% is normal.
If the same visitor taps the same product repeatedly within 5 seconds, it counts as just 1 click. Visits and clicks judged to be bots are excluded from the totals.
On a recipe book page you can also see, for each recipe, detail views (how often the recipe detail was opened — the same visitor reopening it within 30 minutes counts once), ingredient clicks and click rate (ingredient clicks ÷ detail views). In the product list, the recipe row's line starting with "Last 30 days" shows that period, the editor's Stats tab has a By recipe table, and picking a recipe book page on the Analytics screen shows the same table for the period you choose. Opening a recipe once and clicking several ingredients can push the click rate above 100%.
Per-automation performance and funnel
The Send → Click funnel card on the Analytics screen shows how far your auto DMs carried through from sending to clicking during the selected period. The count and rate (%) for each stage are shown in the order DM sent → Opened → Clicked.
The Performance by DM automation table below it shows how each individual DM automation is doing.
| Item | What it means |
|---|---|
| Triggers | How many times the DM automation reacted (e.g. a comment was detected). |
| Sent | How many auto DMs were actually sent. |
| Opened | How many recipients read the DM. |
| Clicks | How many times links inside the DM were clicked. |
The Opened count is shown only when open information is available. If the opened column isn't visible, that's not an error.
Checking traffic sources
The Traffic sources card shows where your visitors came from, by channel. You can see visits and clicks per channel with their share (%), plus a visit trend by channel graph.
The channel is determined once, when the visit starts. Visits arriving through an Instagram auto DM link are classified as Instagram auto DM; everything else is classified based on UTM values in the link or referrer information — Instagram · YouTube · Naver · Kakao · Facebook · TikTok · X (Twitter) · Google, and so on. If the source is unknown it's counted as Direct, and if the source is known but not on the list it falls under Other.
Visits that come from tapping a link inside the Instagram app often arrive without source information, so they may be counted as Direct. That means Instagram traffic can look smaller than it really is.
Measuring precisely with UTM
If you want to split performance accurately by channel, add UTM values to the end of your link for each promotion channel before sharing. For example, if your page address is https://link.uup.kr/mypage, you'd add them like this.
- For your Instagram profile:
https://link.uup.kr/mypage?utm_source=instagram - For a YouTube description:
https://link.uup.kr/mypage?utm_medium=video&utm_source=youtube
Four values are recognized — utm_source · utm_medium · utm_campaign · utm_content — and visits carrying UTM values are classified by those values.
Devices and visit times
- Devices & browsers: shows the share of visitor devices (mobile · tablet · desktop),
in-app browsers (Instagram app · KakaoTalk · Naver app, etc.), and operating systems.
- Visit times: shows visits over the last 30 days by hour and by day of the week. It's a
handy reference for posting when your visitors are most active. This card always covers the last 30 days, regardless of the period selector. With less than 7 days of data it shows "Still collecting data", and the distribution appears once a week or more has passed.
When data shows up
All "today" metrics reset at midnight Korea time (KST). Each metric takes a slightly different amount of time to appear.
| Metric | Time to appear |
|---|---|
| Visits · Clicks · Unique visitors | Within 1 minute |
| Live visitors | Almost instant (based on activity in the last 5 minutes) |
| DM sends | Within 5 minutes |
| DM opens · clicks | Within 15 minutes |
If a visit or click from just now isn't showing yet, give it a moment and it will appear.
Frequently asked questions
My analytics all show 0
Check things in this order.
- Check the period and page selection. If a different period or page is selected, it can
look like there's no data.
- Check that the page is public. If the page is private, visitors can't reach it, so no
records accumulate.
- If you just created the page, there may simply be no visits yet. Data starts
accumulating once you share your link.
- It may be a reporting delay. Visits and clicks can take 1 minute, and DM performance up
to 15 minutes.
Do my own visits get counted?
Yes — if you open your public page address directly, it counts like any other visit. The preview in the editor, however, is not counted as a visit. If you want accurate numbers, avoid opening your own page address frequently.
My click counts don't match Instagram Insights
The counting rules are different. UUP directly counts visits and clicks that happen on your page and auto DM links, with cleanup steps like excluding bots and excluding repeated clicks within a short window. It's natural for the numbers not to match external services exactly.
I can't see the opened count
The DM opened count is shown only when open information is available. Even when it isn't shown, sends and clicks are still being counted normally.
Plans and Billing
This chapter walks you through UUP's plan structure and how payments, cancellations, and refunds work. You can check your plan and pay on the Plans & billing screen, and review past payments on the Payments screen.
Plans at a Glance
UUP has five plans.
| Plan | Best for | What you get |
|---|---|---|
| Free | If you want to start light | 1 link page, basic design and basic stats |
| Basic | If you run your link pages seriously | 5 link pages, all design and stats features, automatic Coupang quick link conversion |
| DM Pro | If you need comment-triggered auto DMs | Everything in Basic + 10 link pages, Instagram account connections (3) and DM automation |
| Upload Pro | If you schedule posts to several channels | Everything in Basic + 10 link pages, Instagram, Threads, Facebook Page, YouTube, and TikTok connections (3 per channel) and auto-upload |
| Ultra | If you need both DM automation and auto-upload | The top plan, including everything in DM Pro and Upload Pro |
- DM Pro and Upload Pro are sibling plans at the same price. DM Pro includes DM automation, and Upload Pro includes auto-upload. If you need both, choose Ultra. On the pricing screen, you can compare the two with the Auto DM / Scheduled publishing switch on the single Pro card.
- Both Pro plans include everything in Basic, and the link page limit goes up from 5 to 10.
- Here are the main limits.
| Limit | Free | 14-day trial | Basic | DM Pro | Upload Pro | Ultra |
|---|---|---|---|---|---|---|
| Link pages | 1 | 1 | 5 | 10 | 10 | 10 |
| Products per page | 30 | 100 | 1,000 | 1,000 | 1,000 | 1,000 |
| Instagram account connections | — | 1 | — | 3 | 3 | 3 |
| DM automations turned on | — | 10 | — | 100 | — | 300 |
| DMs per account per day | — | 500 | — | 2,000 | — | 2,000 |
| Auto-upload posts per month | — | 100 | — | — | 300 | 600 |
| Storage | 200MB | 1GB | 5GB | 5GB | 50GB | 100GB |
- These limits may be adjusted over time. The exact values are listed item by item on the plan cards on the Plans & billing screen. Items a plan doesn't include are marked "Not included" too, so you can compare the cards side by side.
14-Day Free Trial
Your 14-day free trial starts as soon as you sign up.
- No card required. You won't be charged automatically when the trial ends.
- During the trial you can use all link page features, automatic Coupang quick link conversion, and recipe book AI — plus connect 1 Instagram account and actually test DM automation. Auto-upload is included in the trial too, so you can schedule up to 100 posts a month.
- The trial is offered once per phone number.
- When the trial ends, your account switches to the Free plan unless you pay. DM automation stops and your connected Instagram account also pauses sending and collection, but your data is kept for 90 days — pay within that time and you can pick up where you left off.
- You don't lose anything by paying while trial time is left. Your paid subscription starts on the day you pay, and the remaining trial days are added on after your first renewal date. We explain this on the pre-checkout screen as well.
Pricing
Prices are in Korean won, and you'll see the final tax-inclusive amount on the checkout screen before you're charged.
Monthly and Yearly Prices
| Plan | Monthly | Yearly |
|---|---|---|
| Basic | ₩5,500 | ₩52,800 |
| DM Pro | ₩11,900 | ₩114,200 |
| Upload Pro | ₩11,900 | ₩114,200 |
| Ultra | ₩21,900 | ₩210,000 |
- Yearly billing is about 20% cheaper than 12 months of monthly billing.
Extra Account Slots
On DM Pro, Upload Pro, and Ultra, you can connect up to 3 accounts per channel (Instagram, Threads, Facebook Page, YouTube, and TikTok). To connect more, you can buy extra account slots.
- One slot raises the limit on all five channels by one at the same time. You don't need to buy them per channel.
- Each slot is ₩3,900 per month or ₩37,400 per year, up to 20 slots.
- Reducing slots doesn't disconnect accounts you've already connected — it only limits new connections.
Extra 100GB Storage
On Basic, DM Pro, Upload Pro, and Ultra, you can buy extra storage if you run short of space for photos and videos.
- It's added in 100GB units at ₩3,900 per month or ₩37,400 per year each, up to 20 units.
- Reducing storage doesn't delete files you've already uploaded, but you can't upload new files while you're over the limit.
- It isn't available on the trial or the Free plan.
Ultra Early Bird (Sales Ended)
The 12-month Ultra early bird at ₩179,000 stopped selling on September 20, 2026, 23:59 KST. If you already paid for it, here's how it works.
- This price applies to your first 12 months only; from your next renewal onward, the regular yearly price of ₩210,000 applies. You can check the renewal price in advance on the checkout and pricing screens.
- If you paid during a free trial, your 12 months move back by the remaining trial days, and your next billing date moves back by the same amount.
- Because it's a limited-time price, once refunded you can't buy it again at the same price. We remind you of this before accepting a refund request.
Paying from Outside Korea
Your billing currency is based on the country you pay from, not the screen language. Korea is billed in won, Japan in yen, and all other countries in US dollars.
| Currency | Basic monthly/yearly | DM Pro · Upload Pro monthly/yearly | Ultra monthly/yearly | Extra account slot · extra storage monthly/yearly |
|---|---|---|---|---|
| Yen (Japan) | ¥600 / ¥5,800 | ¥1,300 / ¥12,500 | ¥2,400 / ¥23,000 | ¥450 / ¥4,100 |
| Dollar (other countries) | $3.99 / $37.99 | $8.49 / $79.99 | $14.99 / $144.99 | $2.99 / $26.99 |
How Checkout Works
UUP payments go through the secure checkout of Paddle, a global payment provider.
- On Plans & billing, click the payment button on a plan card.
- When the Paddle checkout opens, choose a payment method, check the final tax-inclusive amount, and complete the payment. The available payment methods are exactly what the checkout shows for your country, device, and currency.
- Once payment is complete, your plan is applied shortly. It may take a moment.
Your card statement and receipt may show Paddle (or the name of a Paddle entity) instead of UUP. That's because Paddle handles the sale, payment, tax, and invoicing, while UUP provides the service.
Changing Your Plan
You change plans on the Plans & billing screen.
- Upgrades (e.g. Basic → DM Pro, DM Pro → Ultra): the confirmation screen first shows the amount to be charged and your next billing date; once you confirm, the change applies immediately and you can use the new plan's features right away. The period you've already paid for is credited in the settlement, and the exact amount is shown on the pre-checkout confirmation screen. If you're on a paid plan, you can also change via the Upgrade to Ultra button on the plan management card.
- Switching between DM Pro and Upload Pro is a change between sibling plans at the same price, and you can do it once per billing period. If you need both features, switch to Ultra.
- Switching to an early bird price (when the team has opened an early bird for you individually) doesn't work by charging only the difference. You pay the new plan's amount in full, and the remaining value of your existing payment is then automatically refunded in part. The pre-checkout confirmation screen shows the full charge, the automatic refund, and what you actually pay.
- Downgrades (e.g. DM Pro → Basic): you keep your current plan until the current billing period ends, and the lower plan's fee applies from the next billing cycle.
- Plan changes may be temporarily restricted while a payment is past due or when your next payment is very close. In that case, check your payment method or try again a little later.
- DM automations and connected accounts that exceed the limit after a downgrade are paused but kept for 90 days. Even when moving from paid to Free, pages and products over the limit aren't deleted; until you choose which page to keep public, only your one existing public page stays up.
Cancellation and Refunds
Cancellation
On Plans & billing, click Cancel subscription and cancellation is scheduled from your next billing date. You can keep using your current plan until the billing period ends, and if you change your mind, you can undo it anytime with Undo cancellation.
Refunds
You can request a refund from the Payments screen. How it's handled depends on how much time has passed since payment.
- Within 7 days of payment: it's accepted as a statutory withdrawal of subscription. We let you know the result within 3 business days of receiving the request.
- After 7 days: it's reviewed as a mid-term cancellation refund. The refund is prorated by day for the remaining period, and the larger of two amounts is deducted — 10% of the unused amount, or the portion of the actual payment processing fee corresponding to the remaining period (the two are not added together). The request screen shows the estimated refund first, and once approved, your subscription ends immediately.
- You can also request a refund for payments made at a limited-time discount price such as early bird. For details like how it's calculated, see the refund policy and the guidance on the request screen.
- Refunds go through Paddle's approval process, so they aren't returned instantly. You can track the status in Payments.
- Payments not covered by automatic calculation (such as older payments) can be submitted via 1:1 inquiry — we'll review them individually and get back to you.
Promotion Codes and Referral Credits
Promotion Codes
You can enter a promotion code on the sign-up screen, or, if you missed it at sign-up, apply it after logging in from the Promo code card in Settings. Applying a code extends your free trial to the length set on the code (it applies only when longer than the default 14 days).
- A promotion code can be applied once per account. A code entered at sign-up counts, and if a code has already been applied, the Settings card only shows that code.
- You can apply a code in Settings while you're on a free trial or on the Free plan before a trial. During a trial, the end date is extended right away; before a trial, the code's period counts when the trial starts. The card isn't shown on a paid plan or after a trial has ended.
Referral Credits
On the Refer a friend screen, you can copy your referral link and send it to friends.
- Your referral link unlocks after your first payment. Links are issued to members who have paid for a paid plan.
- When a friend signs up through your link, they get a 14-day free trial, and when they make their first paid-plan payment, 20% of what your friend paid is credited to you.
- Credits are confirmed once 30 days have passed after your friend's first payment with no refund, and confirmed credits are automatically deducted from your next payment. Even after confirmation, if that payment is refunded, the credit is taken back — and if you've already used it, it's offset against your next credit.
- Credits can only be used toward UUP subscription payments and can't be transferred or exchanged for cash.
- On the same screen you can see your invitation status, your credit balance and pending-confirmation list, plus the referral ranking across all members.
Payments and Receipts
- Payments: in the Payments menu on the dashboard, you can review past payments and receipts, and request a refund if needed.
- Managing payment methods and invoices: click the Payment methods & invoices button on Plans & billing to open the Paddle billing portal. There you can change your payment method and download invoices.
FAQ
It says my payment failed
If a recurring payment fails, you'll see a "Your payment didn't go through" notice. Check your payment method within 7 days and you can keep using UUP as is. In the meantime, Paddle automatically retries the payment, and once it goes through, everything returns to normal right away. After 7 days, paid features are paused but your data is kept; if the payment never goes through, your account switches to the Free plan.
Will I be charged automatically when the trial ends?
No. You start without registering a card, so there's no automatic payment. When the trial ends you switch to the Free plan, and you choose and pay for a plan yourself to continue.
The checkout won't open
If you see "We couldn't open the checkout", please try again in a moment. Ad-blocking extensions sometimes block the payment module, so if it still won't open, temporarily disable your extensions or try another browser. If that doesn't help, let us know via 1:1 inquiry.
My card statement says Paddle, not UUP
That's normal. UUP payments are processed by the payment provider Paddle, so your statement shows Paddle.
Recipe Book AI Assistant
The recipe book AI assistant cuts down the manual work of building a recipe book page. With a single post URL from 10000 Recipe (a Korean recipe site), it pulls the recipe name, ingredients, cooking steps, and cooking tools into a draft, and with your own Gemini API key you can polish the cooking instructions in your own voice or create a cover image and step photos with AI. It's been available to paid plans (Basic and up) and 14-day trial members since August 20, 2026.
Requirements
You need all three of the following.
- Basic plan or higher, or the 14-day trial — it can't be turned on on the Free plan.
- A recipe book page — this feature only appears in the settings of recipe-book-style pages.
- A registered Gemini API key — you need to register a key you issued yourself to your account.
AI generation fees are billed to your Google account, not to UUP. UUP doesn't pay on your behalf. You can't turn the feature switch on until you've registered a key.
Getting and registering a Gemini API key
The key is a free credential from Google that unlocks AI usage. Here's how to get and register one.
- Sign in to Google AI Studio with your Google account.
- Click Create API key to issue a key, then copy it.
- In Pages, open your recipe book page's settings and paste it
into the Gemini API key field on the Recipe AI Assistant card.
- Click Verify and save — the key is checked to make sure it actually works, then saved.
Things to know about the key:
- The key is stored per account — register it once and every recipe book on this account shares it.
- The saved key is never shown in full again. Only the last 4 characters appear on screen.
- You can remove it anytime with the Delete button. After deleting, we recommend
also revoking that key in Google AI Studio.
- Image generation and text polishing done with this key are billed to your Google
account. Within Google's free usage tier, there's no charge.
Once the key is registered, turn on the 10000 Recipe import + AI assistant switch and the import, polish, and cover creation tools appear on the recipe creation screen.
Importing a 10000 Recipe post
Start from the Import from 10000 Recipe card at the top of the recipe creation screen.
- Paste a single 10000 Recipe post URL (e.g.
https://www.10000recipe.com/recipe/1234567). You can also paste the app's share text as a whole — only the URL is picked out.
- Click Import as draft.
- The recipe name, introduction, servings, ingredients, and cooking steps are filled
in as a draft. If the post has a cooking tools list, the tools come in too.
Things to know:
- It works one post at a time. There's no way to import a search or a whole list.
You can import up to 30 posts per hour.
- Photos are not imported. The photos in the original post are the author's
copyrighted work. Create a cover with AI or upload your own.
- The source of the original post is automatically added to the introduction.
- The imported content is a draft for reference — we recommend rewriting it in your own words.
Voice and photo style settings
On the Recipe AI Assistant card in page settings, you can set a style just for that page. Settings are per page, so each recipe book can have its own.
| Setting | Used for | Details |
|---|---|---|
| Voice guide (240 chars) | Text polishing | e.g. "Casual and friendly. One emoji per step at most." Leave it empty for a simple, polite tone. |
| Cover photo style | Image generation | Choose from realistic photo, studio, or illustration. |
| Photo mood guide (140 chars) | Cover creation | e.g. "White plate, top-down angle, warm afternoon light". Instructions to add text or logos to the photo won't be saved. |
| Text polishing model | Text polishing | Default or Latest. The latest model writes more naturally but may cost slightly more in tokens. |
| Image generation model | Cover & step photos | Default or High quality (Pro). High quality has better scene consistency but costs about 3x the default per image. |
Polishing cooking instructions
Click Polish in my voice and the introduction and cooking instructions are rewritten in the voice set in page settings. Nothing changes automatically — you always see a preview of the polished result first. You can compare each step with the original, and nothing takes effect until you click Apply. If you don't like it, just cancel.
Safety principle: No matter how much the AI rewrites your sentences, measurements, times, temperatures, heat levels, and non-measured expressions like "a pinch" stay exactly as they are. Any result where even one number differs is discarded and the original is kept. Cooking safety and accuracy come before phrasing.
Creating a cover image
On the recipe creation screen, click Create cover with AI to generate one cover based on the recipe name and key ingredients. The cover photo style and photo mood guide from page settings are applied.
You can also point it at one reference photo. If you've uploaded a photo yourself, a "use my uploaded photo as reference" checkbox appears; if the imported post has a finished-dish photo, a "use the original post's finished-dish photo as reference" checkbox appears.
- When checked, that photo is only sent to Google Gemini along with the generation
request — it isn't stored. We ask the AI to reference only the mood and plating, not to copy it.
- The original post's finished-dish photo may have been taken by someone else, so
review the result before using it.
- Uncheck it and no photo is sent — the cover is created from the text alone.
If you don't like the generated cover, delete it and try again, or replace it with your own photo.
Batch-generating step photos
You can fill each cooking step with an AI photo that fits it. This works both on the creation screen right after importing and, after saving, via Create step photos with AI on the edit screen.
- Steps that have a description but no photo are the targets. Steps that already have
a photo are left alone.
- Click Create N photos for steps without one and a confirmation dialog first
tells you how many photos will be created and how many generation charges that means.
- You can stop while it's running. Photos already created stay.
Things to know:
- Up to 15 photos are created at a time.
- The whole recipe follows one scene setup, so the background, dishes, and lighting
don't shift from step to step.
- Photos you upload yourself always take priority — generated photos never overwrite
them, and the Delete N created photos button removes only AI-generated photos.
- On the edit screen, you can save steps that have photos as card news images —
square images with the step text under the photo, ready to post on social media.
- If the edit screen has unsaved changes, the generate button is locked. Save first,
then generate.
How ingredients and cooking tools appear on the public page
Recipes you import or write yourself appear on the public page like this.
- Ingredients appear as a "name · measurement · buy" list. If you've attached a
Coupang Partners link to an ingredient, visitors can jump straight to the purchase link.
- Cooking tools appear as a separate list right below the ingredients.
- The cooking mode's ingredient sheet also shows purchase links and cooking tools.
Note that adjusting servings doesn't change the tool counts, and cooking tools aren't added to the shopping list.
For the basics of creating a recipe book page, see the 'Creating your page' chapter.
Frequently asked questions
Import says "Recipe post not found."
The post may have been deleted or made private. Double-check the URL, and if it still fails, enter the content yourself. Retrying the same URL multiple times gives the same result.
It says "Your Gemini API key is invalid."
The key was revoked in Google AI Studio or entered incorrectly. Delete the key in page settings, issue a new one, and register it again.
It says "You've hit the Gemini usage limit."
You've reached the usage quota Google set on your key. Try again later, or check your quota and billing settings in Google AI Studio. If the limit is hit during batch generation, the remaining photos aren't created and it stops.
I polished the text, but some sentences didn't change.
Results that would have changed a measurement, time, temperature, or heat level are discarded and the original is kept. This is a safety behavior and can't be turned off.
The AI photo doesn't match the actual dish.
AI-generated images are for reference. If a result looks off, delete it and regenerate, or replace it with a photo you took yourself. Photos you upload yourself are never affected by AI generation or deletion.
Can I turn the feature off and back on?
Yes. You can toggle it anytime with the switch in page settings. Turning it off keeps the recipes and photos you've already made. To turn it back on, a Gemini key must be registered.
Notifications and support
Whenever a question comes up while using UUP, you can reach out to the support team anytime. This chapter covers how to check updates in the notification center, how to leave a 1:1 inquiry and get answers, and how to use live chat.
Notification center
The bell icon at the top of the dashboard is the notification center. When you have unread notifications, a number badge appears on the bell. Press the bell to see recent notifications, and you can view all of them on the notifications page.
These updates arrive as notifications.
- Instagram connection: we let you know in advance when your connection is about to expire or has been disconnected. DM automation takes a break until you reconnect.
- DM delivery failures: we let you know when some auto DMs could not be sent. If it's a cause you can fix yourself, we also explain what to do and how.
- DM automation paused: we let you know when DM automation stops due to plan status or connection issues.
- Billing and plans: payment completed, payment failed, refund approved, trial ending soon, plan period ended, and more.
- Photo and video review results: when a photo or video you uploaded can't be used, we let you know along with the reason.
- Inquiry replies and support team messages: we notify you when your 1:1 inquiry gets a reply or the support team sends you a message.
- Announcements: we share service news.
Pressing a notification takes you straight to the related screen. For example, a billing notification opens the billing screen, and an inquiry reply notification opens the 1:1 inquiry screen. When notifications pile up, you can clear them all at once with the Mark all as read button on the notifications page.
Leaving a 1:1 inquiry
When you want to take your time and ask something in detail, use a 1:1 inquiry.
- Open Support in the left menu.
- Press the New inquiry button to open the inquiry form.
- Write a title (up to 100 characters) and your message (up to 2,000 characters). Telling us when it happened, on which screen, and what didn't work helps us check faster and more accurately.
- If needed, add screenshots under Attach photos (optional). You can attach up to 3 photos, up to 10MB each.
- Press Submit and your inquiry is filed. We'll notify you when a reply arrives.
You can file up to 10 new inquiries per day. If it's about the same topic, continuing an existing conversation instead of opening a new inquiry gets checked faster.
You can attach photos in three ways.
- Press the Photo button and pick a file
- Drag and drop files onto the attachment area
- Take a screenshot and paste it into the input field (Ctrl+V or Cmd+V)
Until you send, you can remove an attached photo with the X button on its thumbnail. Uploaded photos go through a safety check, so you can send once the thumbnail appears.
Reading replies and continuing the conversation
Each inquiry is a conversation with the support team. Press an inquiry in the list to open the conversation, and you can keep sending messages from the input field at the bottom.
- The list is sorted by most recent activity. Even an inquiry you left long ago moves back to the top when a new reply arrives.
- An inquiry's status moves through Awaiting reply → Answered → Closed. If you follow up with another question after receiving a reply, it goes back to "Awaiting reply".
- You can keep writing even in a closed inquiry. Sending a message reopens the conversation and notifies the support team. The screen also tells you in advance: "This conversation is closed. Sending a reply will reopen it and notify the support team."
- Below your last message you'll see Read (the support team has read it) or Delivered (not read yet).
- You can attach photos to replies just like a new inquiry, and the support team can also include photos in their answers.
- URLs written in message text automatically become clickable links that open in a new tab.
Live chat
Press the chat button at the bottom right of the dashboard to open the chat window. It's the fastest channel when you want quick back-and-forth answers.
- Press the chat button at the bottom right. If the button covers part of the screen, you can drag it to wherever you like.
- The chat window shows your conversations so far. 1:1 inquiries, support team messages, and live chats are gathered in one place, sorted by most recent.
- Press Chat with the support team to start a new conversation. Sending a message notifies the support team right away.
- In the input field, Enter sends and Shift+Enter adds a line break. Photo attachments and pasting work the same as in 1:1 inquiries.
A chat conversation's status shows as Waiting for a reply, Support team replied, or Closed. The chat window list shows only your 10 most recent conversations. To see all your past conversations, press View all inquiries at the bottom of the window to go to the Support screen.
When there are unread messages from the support team, a number badge appears on the chat button. The badge keeps updating even while the chat window is closed, so a glance at the button tells you whether a reply has arrived.
When you receive a message from the support team
Sometimes the support team reaches out first. These are messages we send when there's something to confirm about your account or your use of the service.
- When a message arrives, the notification center shows "A message from the support team has arrived." Pressing the notification opens that conversation right away.
- Support team messages are marked with a Support team badge in the Support inbox. You can see them the same way in the chat window's conversation list.
- You can reply to most messages right there. Sending a reply puts it in the support team's review queue.
- Notices that only need your attention don't take replies. These are marked "This notice is for your information only and doesn't take replies", so if you have a question, please leave a new inquiry.
Reply notifications and support hours
- When your inquiry gets a reply, we notify you through the notification center. You can also check the bell icon badge, the unread indicator on "Support" in the left menu, and the badge on the chat button.
- The live chat screen shows the current support hours before you start. From midnight to 9 AM Korea Standard Time (KST), we reply in order as we check messages; outside those hours, the support team replies as soon as they see your message.
- It's fine to step away. Conversations are saved, so you can come back later and read the reply.
Frequently asked questions
My photo won't attach
Uploaded photos can be sent after they pass a safety check. Please wait a moment until the thumbnail appears. You can attach up to 3 photos, up to 10MB each, so please shrink larger files before uploading.
How do I know when a reply has arrived?
When a reply arrives, you get a notification in the notification center, and unread badges appear on "Support" in the left menu and on the chat button at the bottom right. The "Read" indicator below your message also tells you whether the support team has read it.
Can I ask again in a closed inquiry?
Yes — you can continue writing in a closed conversation as is. Sending a message reopens the conversation and notifies the support team. If it's a new topic, leaving a new inquiry gets checked faster.
How is live chat different from a 1:1 inquiry?
Live chat is a short, immediate back-and-forth; a 1:1 inquiry is a detailed message with a title. Whichever way you ask, the same support team answers, and you can see all your conversations together on the Support screen.
Account settings
You manage your account info and security on the Settings screen. Open it by pressing Settings in the left menu of the dashboard — the screen is divided into three sections: Account · Security · Delete account.
- Account: profile (name & email), phone number, connected logins, language
- Security: signed-in devices, login history
- Delete account: deleting your account
Changing your name and email
You can edit your name and email in the Profile card.
- In Settings, edit your name or email in the Profile card.
- Press Save.
- If an identity check window appears, complete it with the verification code sent to your
phone. Once verified, your changes are saved automatically.
- If you leave the name field empty, the nickname from your Kakao or Google login is shown
instead.
- Your email is where payment receipts and important service notices are sent. That's why
changing it requires an identity check.
Registering or changing your phone number
In the Phone number card you can check the current status and change your number.
- Press Change phone number.
- Enter the new mobile number and press Send code.
- Enter the 6-digit verification code from the text message within 3 minutes and press
Confirm.
- Verifying a new number changes your number; verifying your existing number only completes an
identity check.
- If the verification code doesn't arrive, wait a moment and press Resend.
Managing Kakao and Google login connections
In the Connected logins card you can add or disconnect Kakao and Google logins. If you connect both login methods, you can still sign in with one even if something goes wrong with the other.
- Press Connect next to a login you haven't connected yet.
- Complete authentication on that service's login screen, and a Connected badge appears.
- You can't disconnect your last remaining login method. To disconnect it, connect another
login first.
- A login that's already connected to another UUP account can't be connected.
Changing the display language (Korean · English · Japanese)
You change the language of the dashboard text in the Language card. You can choose from 한국어 · English · 日本語.
- The language setting is saved only in the browser you're using now. If you sign in on
another device, choose it again there.
- Your public pages don't follow this setting — each page follows its own page language
setting (default: the visitor's browser language).
Switching light and dark mode
You switch the display mode not on the Settings screen but with the display mode icon button at the top of the dashboard. Each press cycles through Light → Dark → System.
- Choosing System follows your device's display mode setting in real time.
- This setting is also saved only on the device (browser).
- Your public pages follow their page theme, so dark mode doesn't affect them.
Logging out and managing signed-in devices
To log out of the device you're using now, press Log out at the bottom of the dashboard's left menu.
You manage access from other devices in the Signed-in devices card in the Security section.
- Check each device's last activity time in the list. The device you're using now has a
This device badge.
- If you see access that isn't yours, press Log out next to that device to sign out that
device only.
- Pressing Sign out of all devices logs you out of every device, including the current one.
In the Login history card you can review the last 90 days of login and security events (logins, failed logins, verification code errors, device sign-outs, and more) along with the date, device, and IP range. If you see access that isn't yours, sign out of all devices and log in again.
Deleting your account
You delete your account in the Delete account card in the Delete account section.
- Press Continue to delete.
- Read the notice in the confirmation window and type DELETE in the input field.
- Press Delete account.
Before you delete your account, keep these in mind.
- Deletion can't be undone. Your link pages, DM automations, and integrations all stop, and
the personal data destruction process begins.
- You can't delete your account while a subscription is active. First schedule an
end-of-term cancellation or request a refund in Plans & billing. If you scheduled an end-of-term cancellation, you can delete your account after the period ends; if you requested a refund, after the refund is finalized.
- Records that must be kept by law are stored separately for the required period. Under the
privacy policy, contract and payment records are kept for 5 years, and free trial history is stored separately for 1 year after deletion as an irreversible phone number hash before being destroyed. All other personal data is destroyed without delay.
Frequently asked questions
I changed my name, but a different name is shown.
If you leave the name field empty, the nickname from your Kakao or Google login is shown. Enter the name you want and save it.
I changed the language, but it's unchanged on my other device.
The language setting is saved only in the browser. Choose it once on each device.
The verification text message isn't arriving.
Wait a moment and press Resend. You must enter the verification code within 3 minutes of receiving it, and after several wrong entries you'll need to request a new one. If it still doesn't arrive, let us know through a 1:1 inquiry.
I can't disconnect my Kakao (or Google) login.
You can't disconnect your last remaining login method. Connect another login first, then disconnect it.
The delete button won't respond.
The button activates only when you type DELETE in the confirmation field exactly as instructed. If you have an active subscription, you need to finish the cancellation or refund first.
Didn't find what you were looking for?
Sign up and try every feature free for 14 days.